According to January 2017 website survey, it was discovered that there are nearly 1,800,047,111 websites running over the globe.
The websites of today are majorly built using content management systems like Magento, WordPress, Joomla, Drupal, etc.
The reason for selecting a CMS for creating any website is to overcome the problem of writing lengthy code. Instead of that, pre-written code(plugins) is managed in the panel to provide the required features.
Apart from that, there are numerous plugins available in the market to fulfil your social sharing requirements on CMS-based websites. But you may not be satisfied with any of them (the reason may be their non-impressive style or poor functionality).
What if I tell you that you can create your own social sharing links manually without installing any plugin or using any tool.
Table of Contents
Quick Tips to Generate Social Sharing Site Buttons For Website
Let’s dive more into the simple techniques you need to follow for creating social sharing site buttons :
BASIC REQUIREMENTS:
To implement the process, you need two things:
1- Social media icons as per your taste and liking.
2- Keen interest to learn new things without any coding knowledge.
BASIC CODE FOR TOP SOCIAL PLATFORMS
Following is the basic code that can be used for creating social sharing links. You only need to replace the URL, TITLE, and SOURCE, which will be discussed later in the blog.
[URL]- Replace this with the URL you want to share on different social platforms.
[TITLE]- Replace it with the title/text that needs to be shared with the URL.
[SOURCE/DOMAIN]- In case you have used any other website as a source and you want to tell your viewers about it too, then replace it with your reference source.
[MEDIA]- Replace it with the address of the image that is to be used on Pinterest.
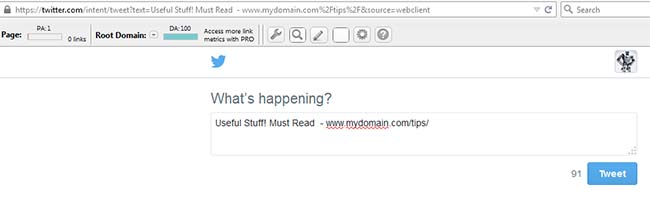
Case I- As soon as you replace the above-mentioned code, you will encounter space between words used in the Title tag. As a hyperlink doesn’t allow any space, it will create a problem for you. So, to resolve the issue of space between words, you need to use “%20” or “+” which symbolizes one space between two words.
For e.g.
title=Create%20social%20sharing%20links
OR
title=Create+social+sharing+links both will give the same result.
Case II- While creating the links, you might also experience that slash “/” in the [URL] is replaced with “%2F“. So, don’t bother about it. You can use any of the two formats to create the executable links.
For e.g.
url=https://www.mydomain.com/page-test
OR
url=https:%2F%2Fwww.my domain.com%2Fpage-test
both these URLs will be implemented in the same manner.
Case III- While writing the URL, you can also use “%2D ” in place of “-“. You don’t need to get confused in between these two codes.
Case IV- You will also find that while writing the URL, in place of the colon “:”, “%3A” is used. Both these codes represent the same while creating the links.
For e.g.
url=https://www.mydomain.com
OR
url=http%3A%2F%2Fwww.mydomain.com
Now, let’s try out one live example that will illustrate the use in a better way.
In case you are implementing this in a simple HTML-based website, then you need to use the above code as it is. There you only need to change the href link and image path (image link address). But if you are running a CMS-based website, then you don’t need to take any headaches to use the complete code. Instead, you only need to hyperlink the image social sharing icon with the link mentioned in href.
Extra Stuff for Social Media Buttons:
As of now, you are all set to create your own social sharing buttons manually. But to enhance its functionality, you need to use two attributes within the above-mentioned steps.
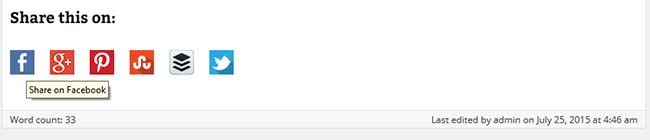
1- Use title=”Share on Facebook” in the anchor tag. It will allow the user to see what your icon is made to do when you hover the mouse pointer over the image.
2- Use target=”_blank” within the anchor text. This attribute will automatically open a new tab as soon as a visitor clicks on one of the sharing links. It will allow the user to share your post without hampering it.
So, from now onwards, you don’t need to hire any web developer to fulfil your requirements regarding social sharing options. You can create your own social buttons without any programming knowledge as well as any pre-build plugin or tool.
If you need to know about more social share buttons then, feel free to comment your requirement in the comment box below.
Mohsin Qureshi is a seasoned digital marketer with over 12 years of experience, including 7 years working as a Team Leader in SAG IPL. His expertise lies in SEO, SMO, PPC, influencer marketing, and strategy building with a focus on driving impactful results and growth for businesses. With a keen eye for innovation and a commitment to excellence, Mohsin has been delivering tailored digital marketing strategies and solutions to help businesses excel online.
LinkedIn


![Most Popular eCommerce Platforms for Online Business [ Updated May 2025]](https://blog.sagipl.com/wp-content/uploads/2023/06/Most-Popular-eCommerce-Platforms-300x158.jpg "Most Popular eCommerce Platforms for Online Business [2026]")
